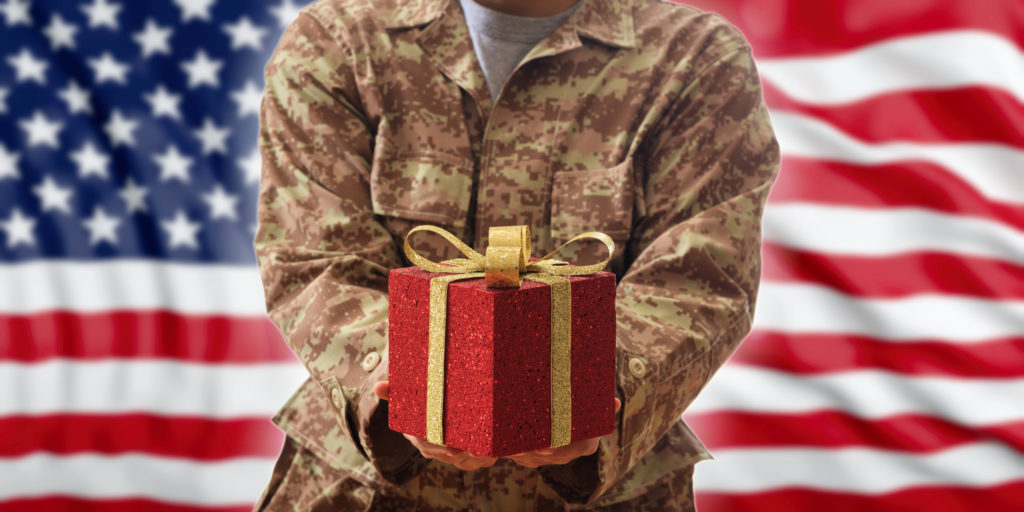
VETERANS HOLIDAY ORGANIZATIONS
Christmas can be a hard time of year for many veterans. There is help out there, not only during the holiday season but year round. There are many organizations who will assist active duty members and veterans in crisis or with day to day needs. Whether it is temporary holiday help, or longer term assistance, veterans can connect with any of these organizations by phone or online and they will assist you with your needs, or connect you with an organization that is best suited to help you. CLICK ON THE LINKS BELOW FOR MORE ASSISTANCE.
AMERICAN LEGION POST 1 – The American Legion has a number of programs to stand by and support the veterans and their families during their service to the nation and when they return home.
- 1601 Berry Ave Santa Fe, 87505
-
- 505-982-9622
- www.legion.org
VEHICLES FOR VETERANS NEW MEXICO – Supporting Disabled Veterans
- www.vehiclesforveterans.org
- 1-855-811-4838
VETERANS CRISIS LINE
-
www.veteranscrisisline.net
-
Call 1-800-273-8255 and Press
-
Text 838255
DAV NEW MEXICO – Veterans transportation to medical appointments at the various VA hospitals and clinics around New Mexico.
-
www.davnewmexico.org
- (505) 294-6193
ELKS LODGE #460 – Elks pledge “So long as there are veterans, the Benevolent and Protective Order of Elks will never forget them.” The Elks National Veterans Service Commission takes that pledge one step further, and promises service to our nation’s veterans and military members, with a special focus on service to those in need.
- (505) 983-7711
- 1615 Old Pecos Trl
Santa Fe, NM 87505-4736 - www.elks.org
- ADOPT A VETERAN
- WELCOME HOMEHONOR FLIGHT NORTHERN NEW MEXICO – Honor Flight of Northern New Mexico is a 501c-3 non-profit organization dedicated to providing Veterans with honor and closure by taking them free of charge to reflect up on their memorials in Washington, D.C. Priority is currently being given to World War II and Korean War Veterans as well as terminally ill veterans from other conflicts
- honorflightnorthernnm.org
- 505-835-1993
IRAN AND AFGHANISTAN VETERANS – We know coming home isn’t easy. If you’re a veteran or a veteran family member facing transition-related challenges or have questions, we can help.
OPERATION HOME FRONT – We build strong, stable, and secure military families so they can thrive — not simply struggle to get by — in the communities they have worked so hard to protect. For over fifteen years, we have provided programs that offer: RELIEF (through Critical Financial Assistance and transitional housing programs), RESILIENCY (through permanent housing and caregiver support services) and RECURRING FAMILY SUPPORT programs and services throughout the year that help military families overcome the short-term bumps in the road so they don’t become long-term chronic problems. OPERATION HOME FRONT HAS CRITICAL FINANCIAL ASSISTANCE PROGRAMS IF YOU ARE IN NEED.
NATIONAL COALITION FOR HOMELESS VETERANS – IF YOU NEED HELP WITH HOMELESSNESS CONTACT THEM TODAY
- www.nchv.org
- Call the National Call Center for Homeless Veterans at 1-877-4AID-VET (1-877-424-3838)
RED CROSS – The Red Cross helps members of the military, veterans and their families prepare for, cope with, and respond to, the challenges of military service.
SALVATION ARMY – The Salvation Army exists to meet human need wherever, whenever, and however we can.
SEMPER FI FUND – Proven. Effective. Immediate. We provide financial assistance and lifetime support to combat wounded, critically ill and catastrophically injured service members and their families.
SOLDIERS ANGELS – Soldiers’ Angels has many wonderful programs to support our military families, deployed service members, wounded service members and veterans. Our programs are broken into categories based on the population they serve. Soldiers’ Angels offers programs for wounded, deployed, families, and others.
VA VOLUNTEER SERVICES
VFW – The VFW offers a wide range of assistance programs aimed at helping veterans of every generation. Whether that means providing free, professional help filing or appealing a VA claim, offering scholarships for post-secondary education or providing emergency financial relief when times get tough, the VFW is there for America’s veterans.
- http://myvfw.org/newmexico/
- Webmail Link: http://www.vfwwebmail.com/
 Vincent A. Lopez has recently joined SkyTech Home Inspection Services of New Mexico LLC as Vice President and Director of Field Operations.
 When you turn back the clocks, don’t forget to also do this 1 crucial thing
 How to ensure that your New Mexico Home Inspection is performed in as thorough and professional manner as possible…
 Why request a New-Construction Phase-by-Phase Home Inspection from SkyTech New Mexico?
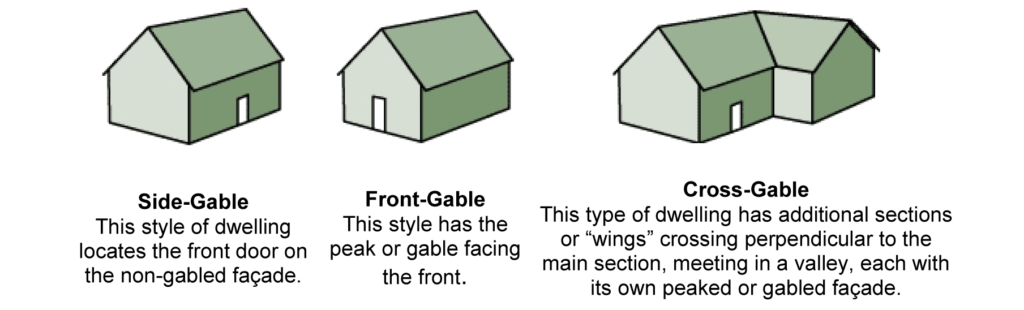 Hip
Hip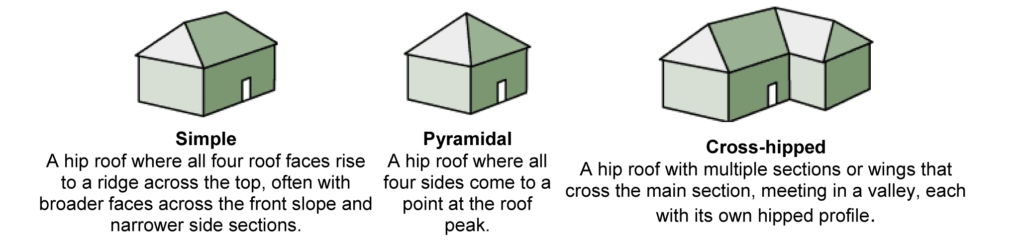
 Flat
Flat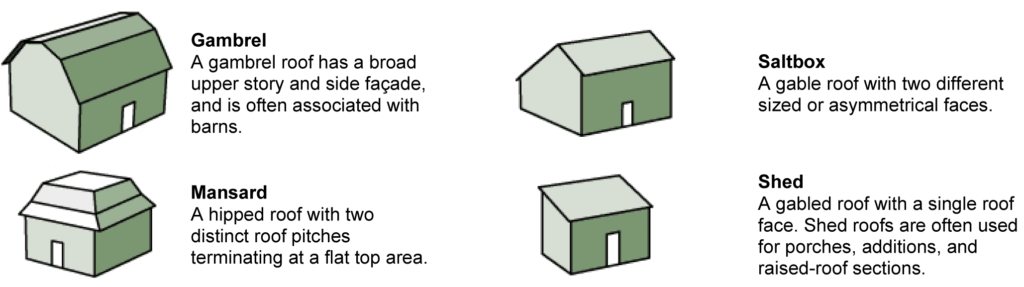
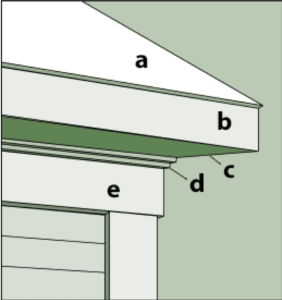 A. Roof – The upper exterior surface of the home.
 Saving On Energy Costs This Winter
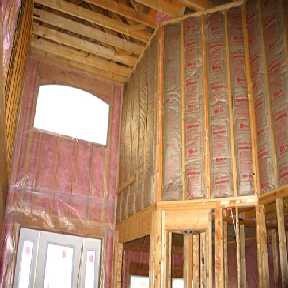
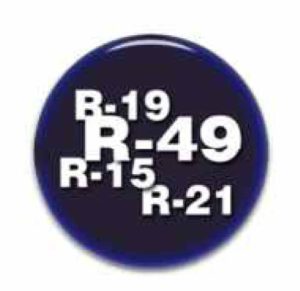 When considering R-value as a means to determine the thermal resistance of a building component, there are other factors that must also be taken into account. While R-values are an excellent guide for comparing the attributes of different insulation products, they apply only when the insulation is properly installed.
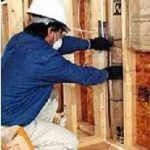 Calculating and Converting R-Value
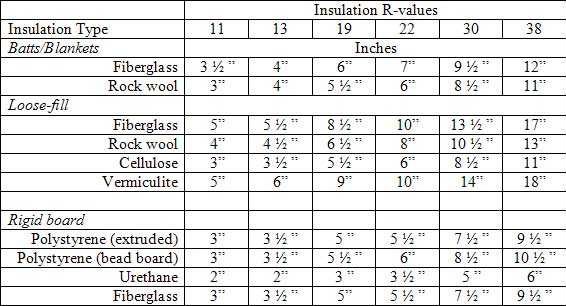
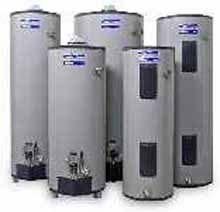
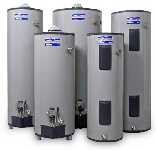
 Tank Water Heater Construction
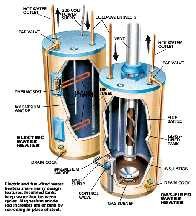 Heater Effectiveness
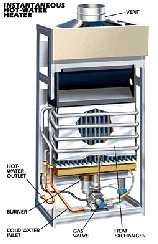 Tankless Unit Principle of Operation
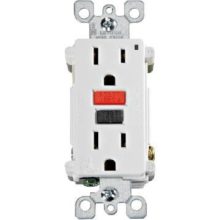
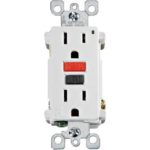 Ground-Fault Circuit Interrupters (GFCIs)
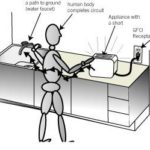 A PRACTICAL EXAMPLE OF A GROUND FAULT IN THE HOME
 BASIC OPERATION OF THE GFCI
 GFCI’S AND THE NATIONAL ELECTRICAL CODE (NEC)
 • All UL approved testers come with brief instructions. Read the instructions first!